The heater
The day I decided a heater as needed for the trailer
One of the downsides of the mobile workshop is it isn’t exactly a warm place and there is only so many hats you can wear. While I have the onboard battery system and inverter which would allow me to run a fan heater it bumps up into the issue of battery energy density sucks. The battery pack has about 1Kwh of energy which would let me run a 1Kw fan heater for an hour. That is without any tools being used. That isn’t going to work. Time to go over to good old chemical energy (sorry Greta) as 1ltr of diesel contains about 10Kwh of energy.
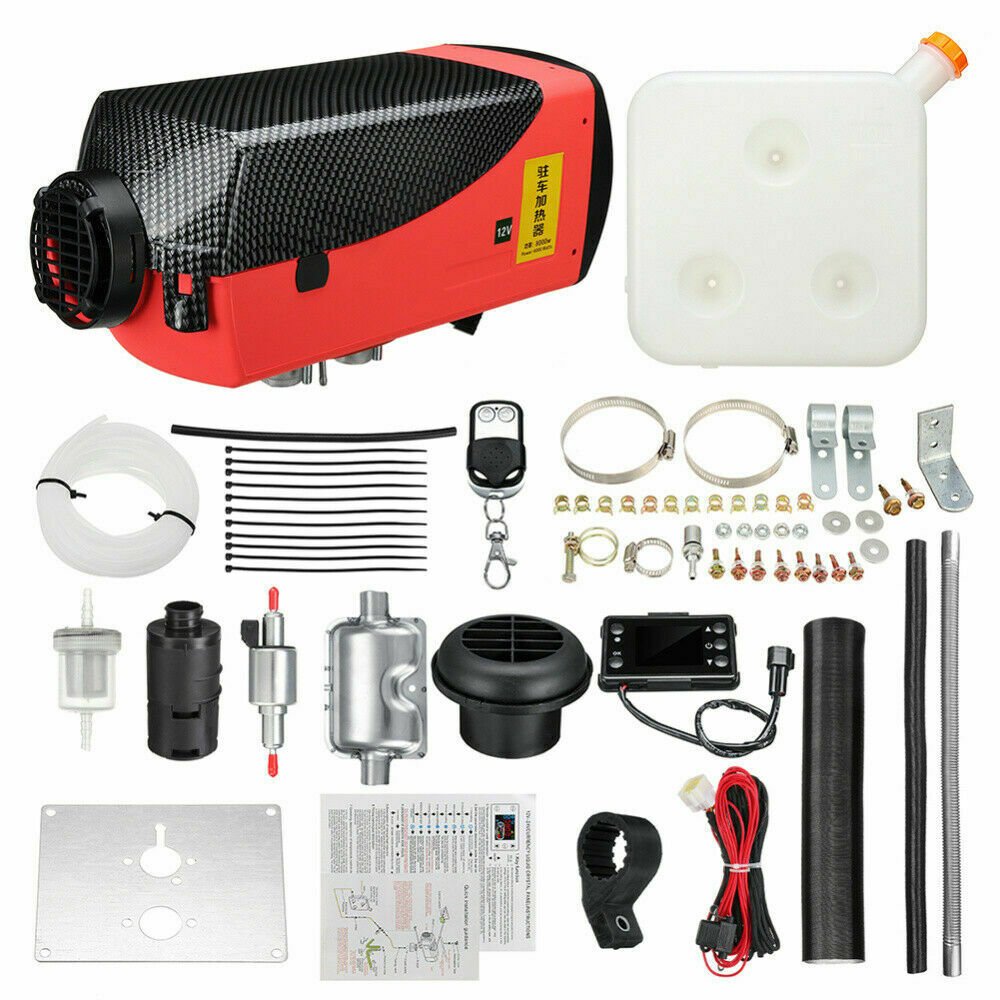
To get all this lovely chemical energy into heat there is various options on the market. The most common being a diesel fired camper van heater. These take fuel and drip it into a chamber with a glow plug. The glow plug heats up until it is hot enough to set light to the fuel. Then the glow plug turns off and the process is self sustaining. This chamber has a small fan feeding air into it which then goes out of an exhaust. The outside of the chamber is covered in fins and the main fan blows air over these which then heated which is what gives you your hot air. These do need to take some 12volt power but with the two big batteries i have for running the inverter this shouldn’t be an issue.
One of these from webasto in Germany a typical kit is about £1000, but China found one of their units and ran it through their “lets ignore all copyright laws industrial machine” and you can now buy kits at £100.
Which is what I did.
The best way to mount one of these units is to mount it inside your camper van under a bed or a seat so it is kept nice and dry. I don’t have a bed or a seat. I did consider mounting it into one of the workbenches but they are already pretty full with drawers and machinery. Also I want to have the ability to have the mobile workshop to be converted back into a box trailer quickly so i can collect exiting things like sofas. This meant I had to look at the slightly more unusual way of building a box for it outside. This has been done by quite a few others so not exactly a new idea.
Of course I forgot to take any pictures of the actual build. of the box. it is a steel from which is covered in some exterior phenolic plywood which i had acquired.
So what you see is the quite large box I built for the front of the trailer. This box is way bigger than is needed for just the heater. This extra size is partially driven by wanting to match the profile of the trailer but also so i can use the extra space for storing stuff like levelling blocks etc.
To get the best use of these heaters it is recommended that you draw air from the space that is being heated. I decided not todo this for a few reasons.
Outside air is dryer than inside air so by pushing in dry warm air I can reduce condensation. This will protect tools and stop it raining so much from the cold skin roof
As sharpening produces dust having a source of clean air will help displace some of this dust outside.
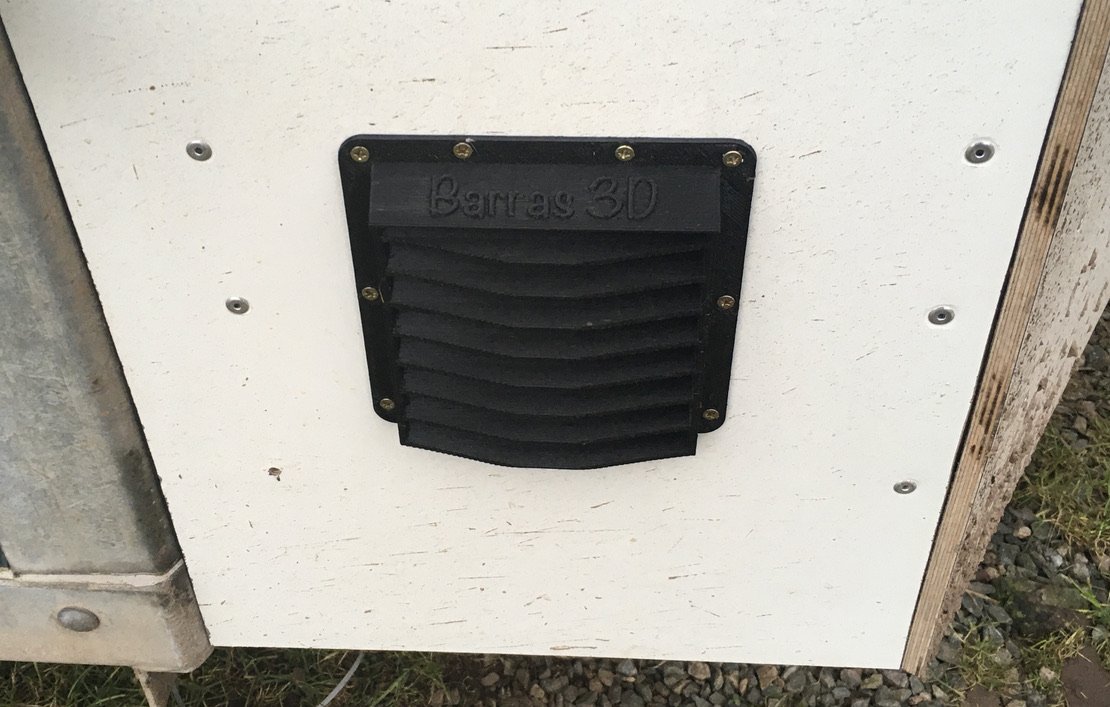
To achieve this I prodded Barras 3D into action to make a nice 3D printed Louvre for the outside. Seeing the box was mounted where the ammeter from the towcar charging cable I also had to make a wee mount for the ammeter.
Front View
Excuse the duct tape as the hinges i bought didn’t quite work.
The fuel tank which contains 10ltr of fuel is mounted above the box. The fuel line then goes inside the trailer and drops down to return inside the box where the fuel pump is located.
You can see the air inlet Louvre on the side of the box
Air Intake
Printed in PETG to resist the UV in sunlight (link for our scottish readers) as well as being a bit more flexible than PLA
Ammeter
Printed from Polycarbonate CF mainly because I could. Would be just as functional if printed from PETG
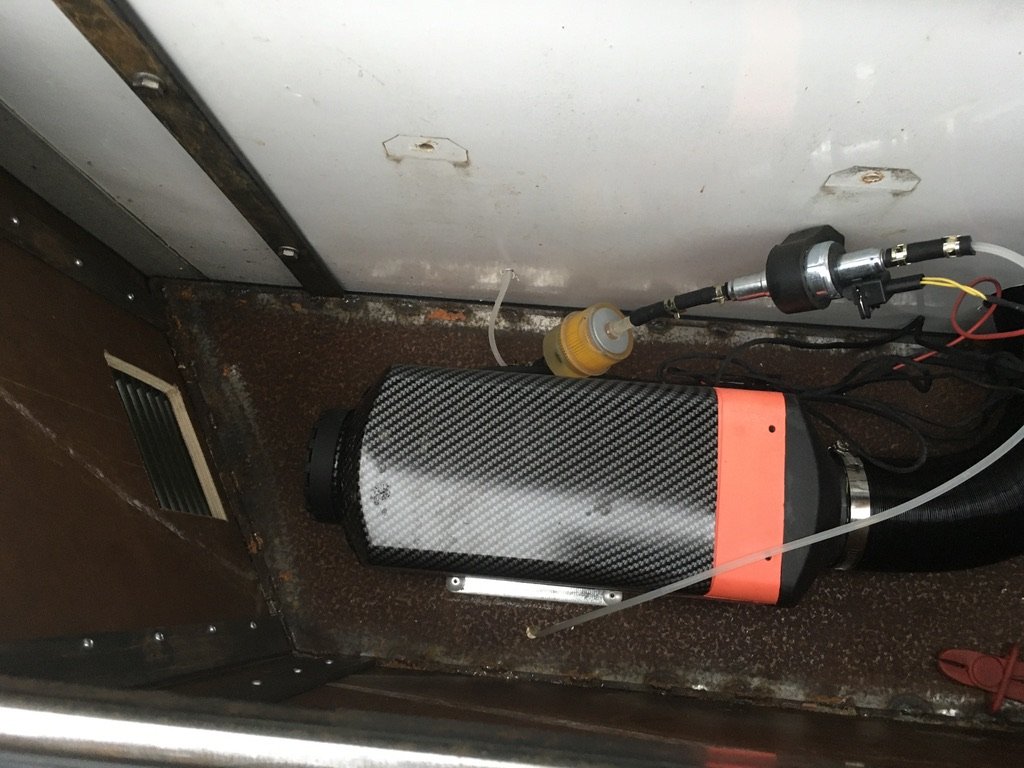
Inside the box
This shows the actual heater. Loads of room around it so it will be easier to carry out any work on it. Also should i choose to install a different model i have lots of wiggle room.
You can see pump which supplies and meters the amount of fuel going into the unit.
The hose to the right is the hot air going into the tailer.
Control panel
This is the control panel which lets you do wonderful things like set temperature, times, frost protection etc. The manual is in chinglish so I have not got a clue how todo any of this.
I make do with the basic functions of on and off and hot or hotter
I’ve been running this for a couple of weeks and it does what it sayes on the tin. It takes the temp from a distinctly chilly 2ºC up to a more workable 15ºC in about 20 minutes. It uses very little fuel with about a 3rd of a tank lasting me from when i leave the house to when I do my last stop. It does however pull more amps than i was expecting on the 12V side so I will need to keep an eye on that. Solutions being a 3rd battery in the heater box or push on with the solar. The downside of the solar being it will work best on days where i don’t need the heater. This will be a case of wait and see.
The one downside is the included fuel filter with the kit is total cack and it started leaking after 48hours. I had a few spares on hand for the lawnmower onhand so I replaced it with one of those.


